- 記事一覧 >
- ブログ記事

【MSAL】Dataverse Web APIから認可コードフロー+PKCEで自分のデータだけを取得
はじめに
learn.microsoft の「クイック スタート: msal.js を使用して Dataverse の SPA アプリケーションを登録して構成する」
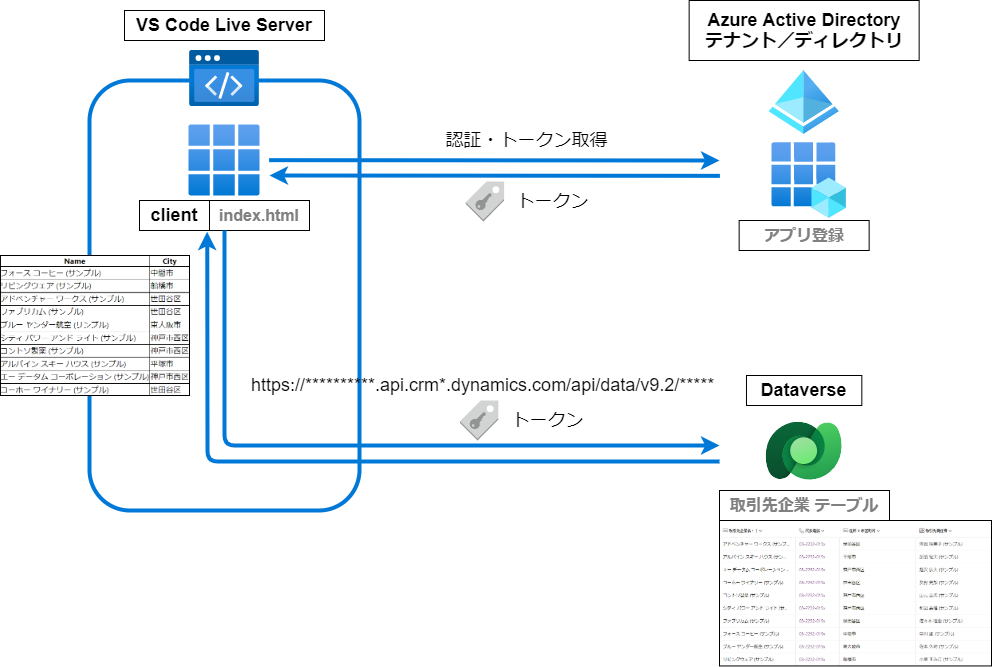
をやってみましたところ、Azure AD ユーザーのサインインを行い、PKCE による承認コード フローを使用し、アクセストークンを使って、Dataverse(Dynamics 365 / Dataverse Web API)から直接データを取得することに成功しました。
learn.microsoft の記述ほぼそのままですが、独自テーブルからのデータ取得も含めて、手順の実際の様子を紹介していきたいと思います。
サンプルアプリは、HTML & Vanilla JavaScript(素のJavaScript)です。CDN から Microsoft Authentication Library (MSAL) を読み込んでいます。
前回「Dataverse に独自テーブルを作って自分で登録したレコードしか閲覧編集できないようにする」の記事を書きました。
最後にこれのデータも取得してみます。
本記事情報の誤りにより何らかの問題が生じても、一切責任を負いません。
自己責任でお願いします。
2022年10月現在の状況を元に説明しています。
アプリケーションの登録
Azure AD(Azure Active Directory) の アプリの登録 にアプリ(今回作成する Web クライアント用の設定)を登録します。
アプリの登録 が完了すると、アプリケーション (クライアント) ID が生成されます。これが後に作成する Web クライアントプログラムで必要になります。
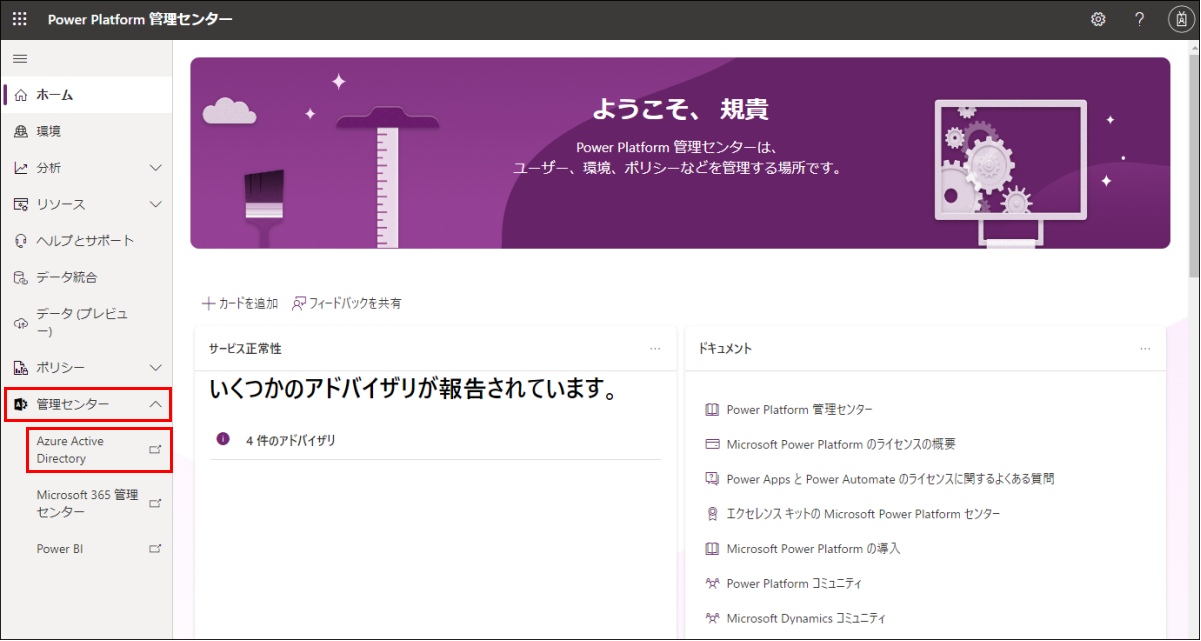
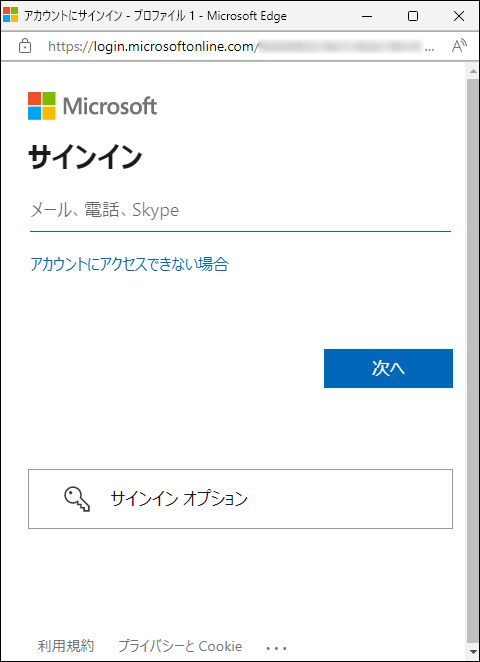
管理者で Power Platform 管理センター(https://admin.powerplatform.microsoft.com/)にて、管理センター をクリックして、Azure Active Directory をクリックします。
Microsoft Entra 管理センター に遷移するため、Azure Active Directory から Applications をクリックして、アプリの登録 をクリックします。
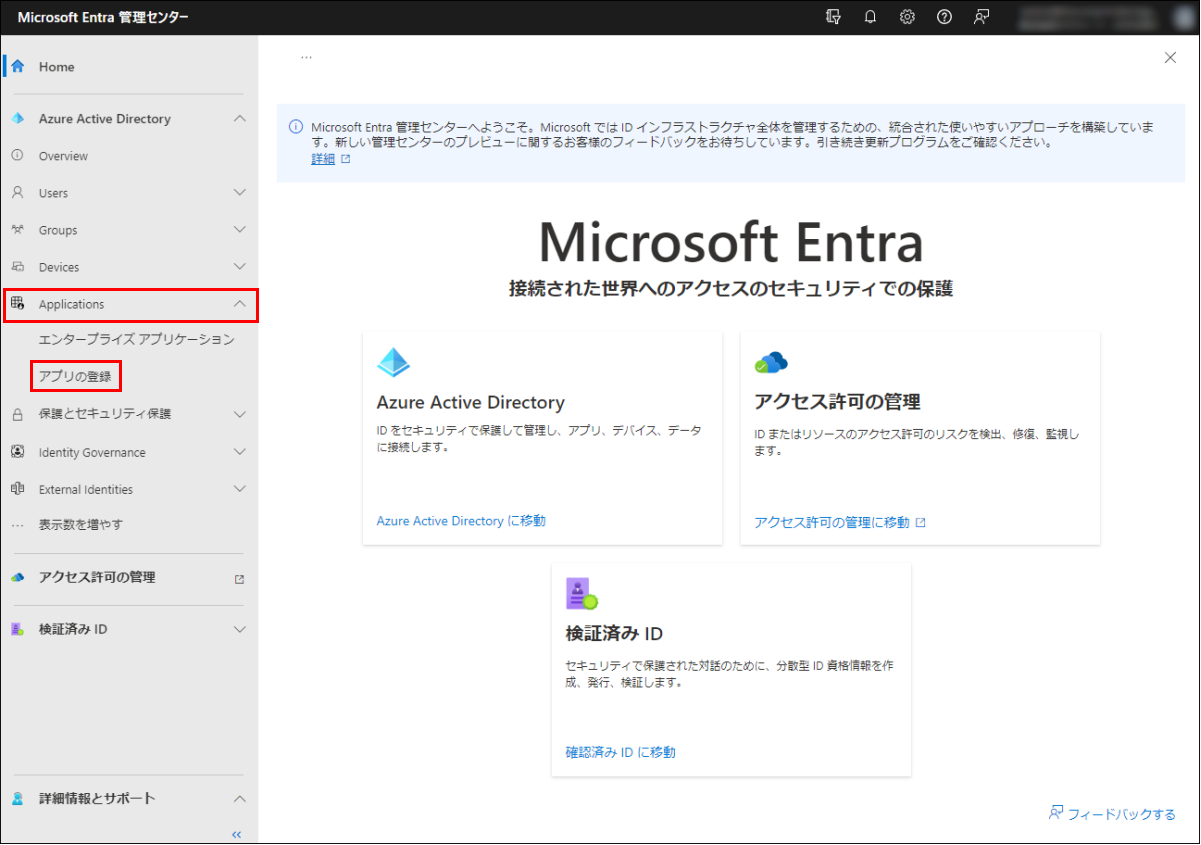
これは、Azure ポータル → Azure Active Directory → アプリの登録 でも入口が異なるだけで同じです。
【 Microsoft Entra 】
「Azure Active Directory」「アクセス許可の管理(Entra Permissions Management)」「検証済みID(分散型 Identity)」の3つの機能が提供されています。
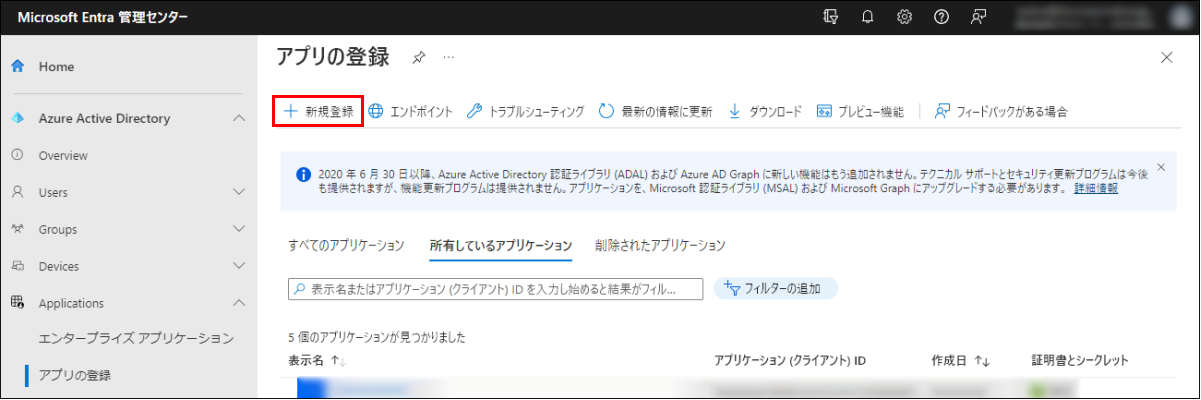
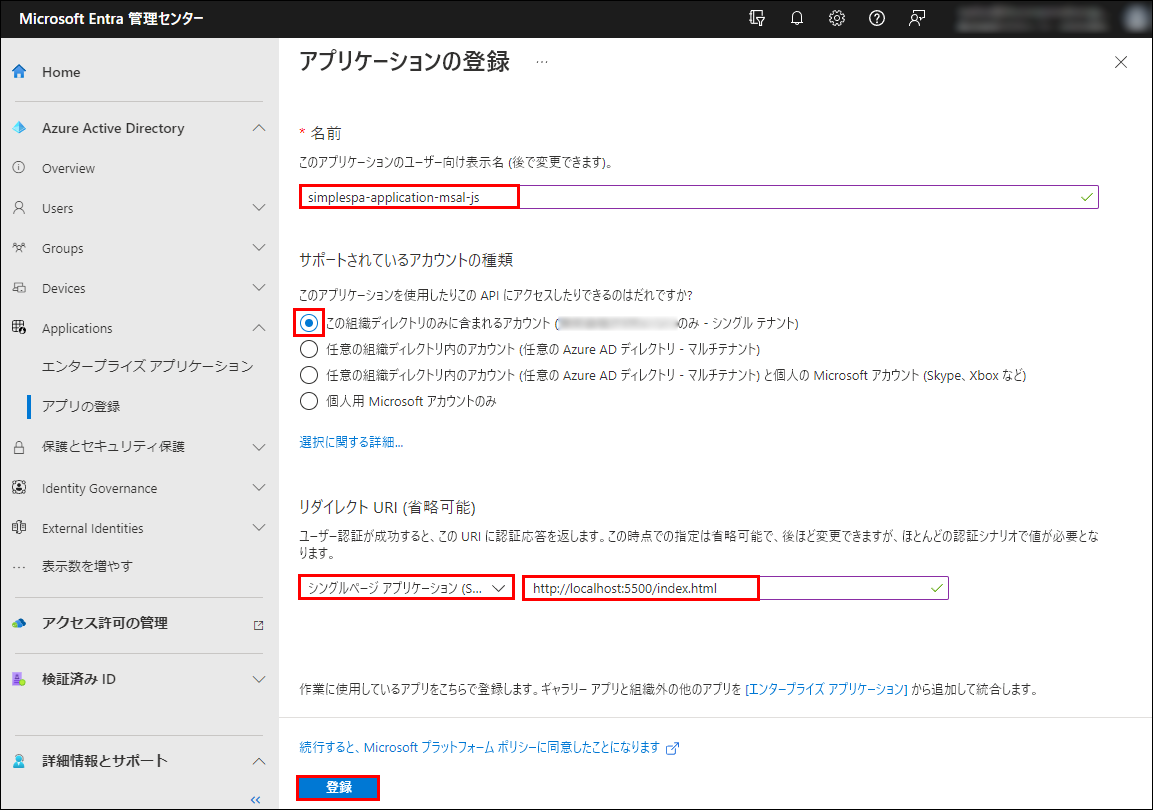
+ 新規登録 をクリックします。
名前: simplespa-application-msal-js(任意)
サポートされているアカウントの種類: この組織ディレクトリのみに含まれるアカウント (<テナント名> のみ - シングル テナント)
リダイレクト URI: シングルページアプリケーション (SPA) http://localhost:5500/index.html
として、登録 をクリックします。
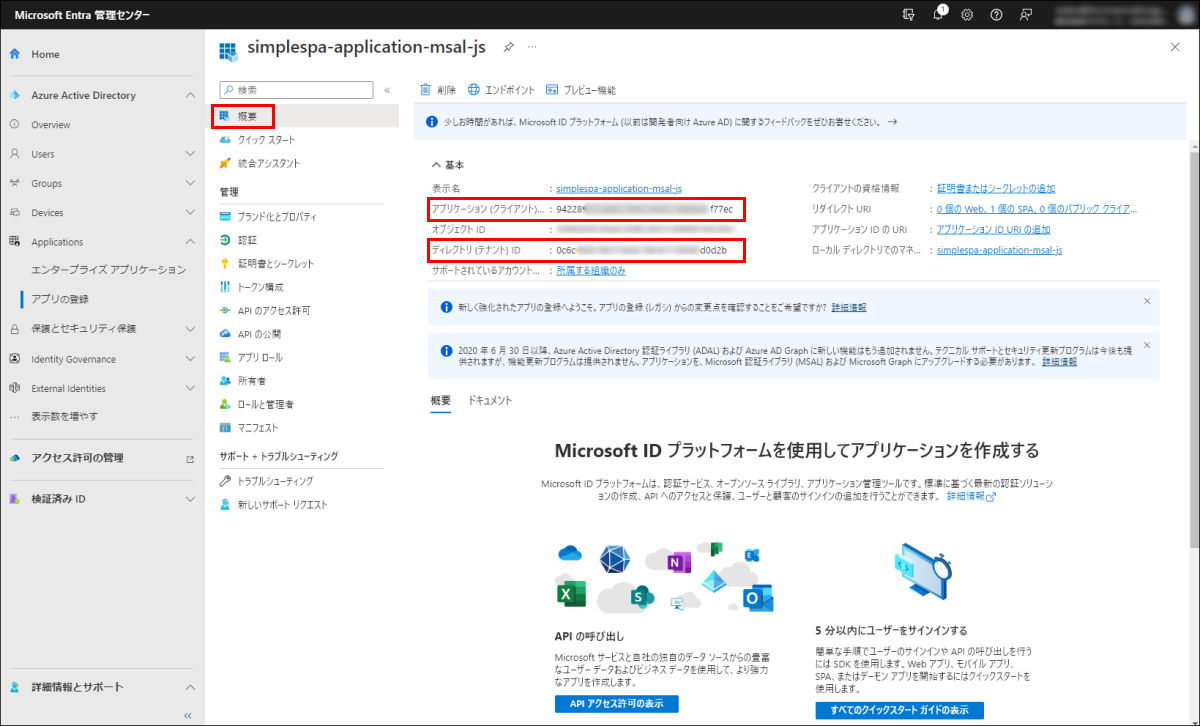
概要 に表示される
アプリケーション (クライアント) ID: 94228***-****-****-****-*******f77ec
ディレクトリ (テナント) ID: 0c6c0***-****-****-****-*******d0d2b
の値をコピーして控えます。
(後に作成する Web クライアントプログラムで必要になります。何度でも表示されます。)
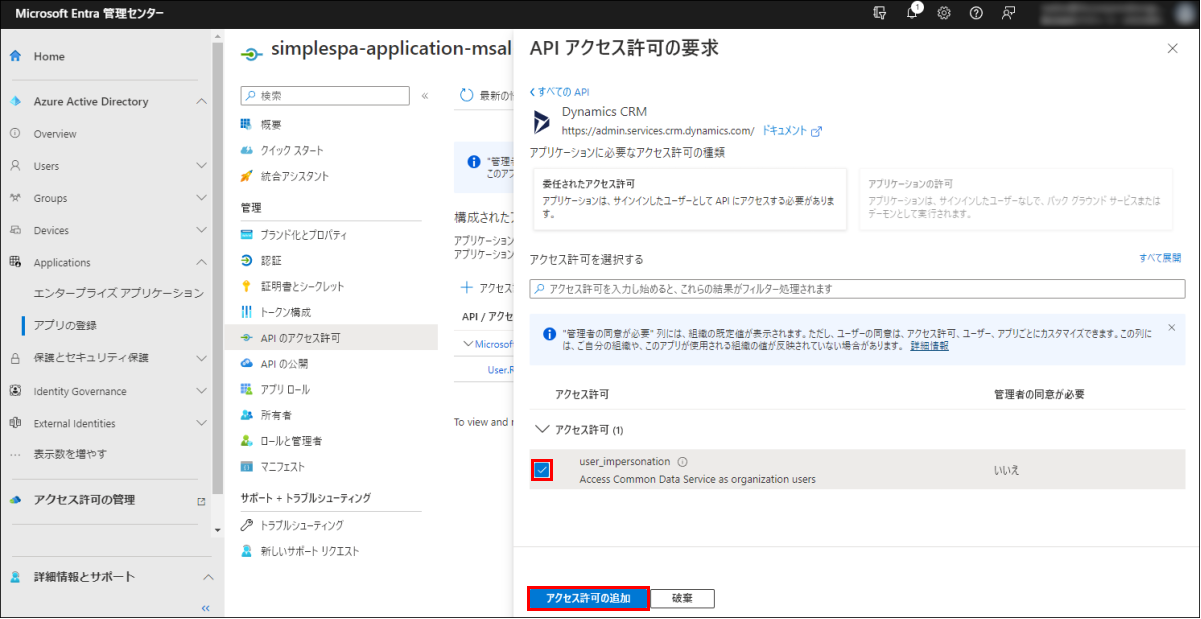
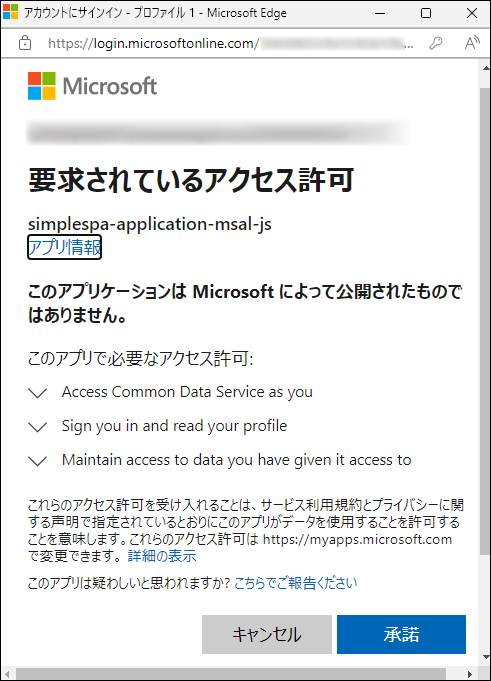
API のアクセス許可 をクリックして、+アクセス許可の追加 をクリックします。
Microsoft API タブから Dynamics CRM をクリックします。
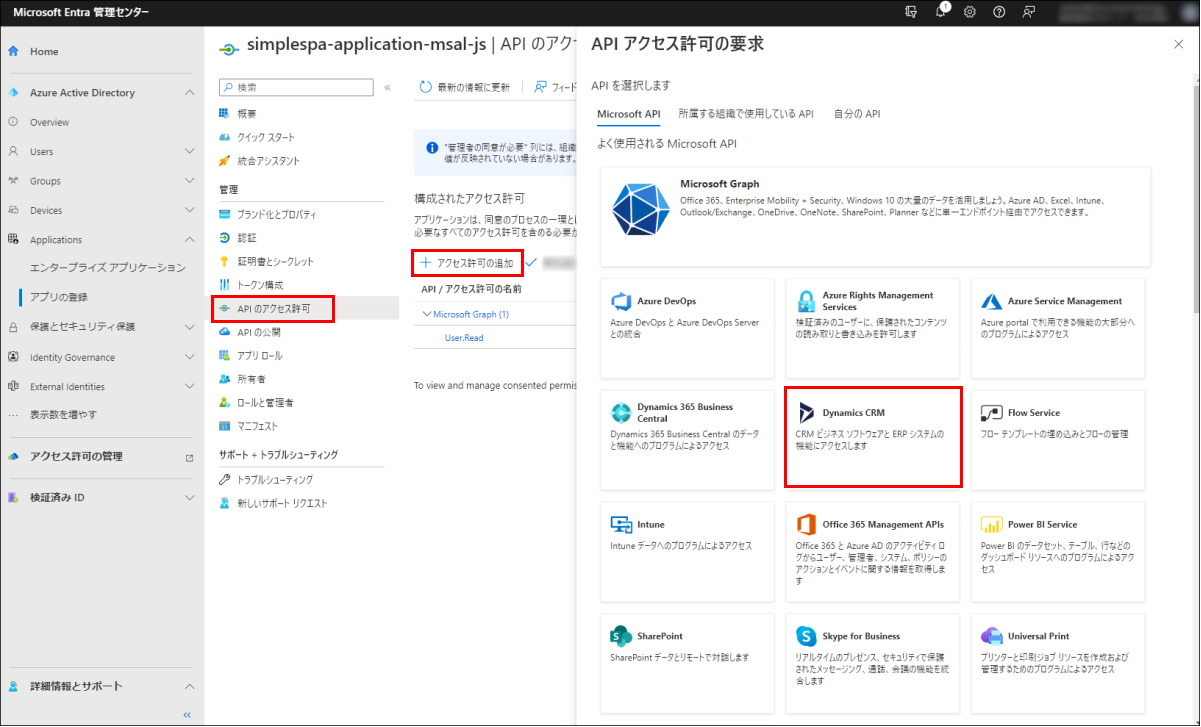
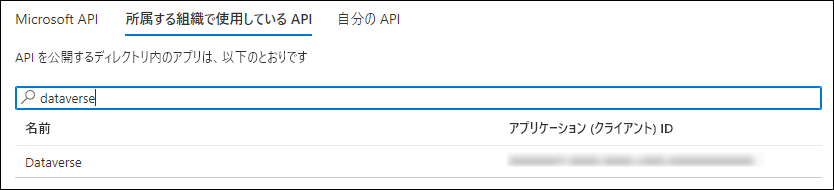
元々の文書では、「Dynamics CRM が表示されない場合は、Dataverse」とあり、Dataverse も見つかりましたが、今回は、(問題無く目的を達成するので、)Dynamics CRM とします。

アクセス許可 のところの user_impersonation にチェックを入れて、アクセス許可の追加 をクリックします。
impersonation = なりすまし
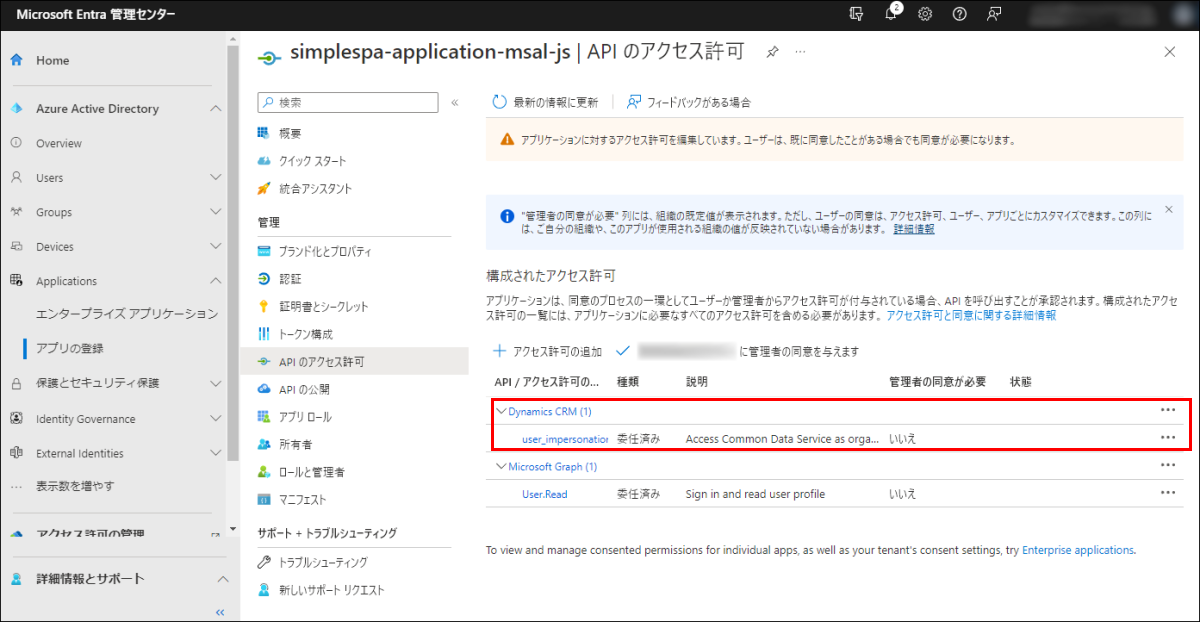
API のアクセス許可 が追加されています。
Live Server
今回作成するのは、index.html です。これを localhost:5500 の Web サーバーで見られるようにします。
今回は、Live Server で実現します。
適当に手持ちの簡易Webサーバーでやっても特に問題ありません。ただし、ポート 5500 の部分が異なる場合、この記事中の 5500 を全て読み替える必要があります。
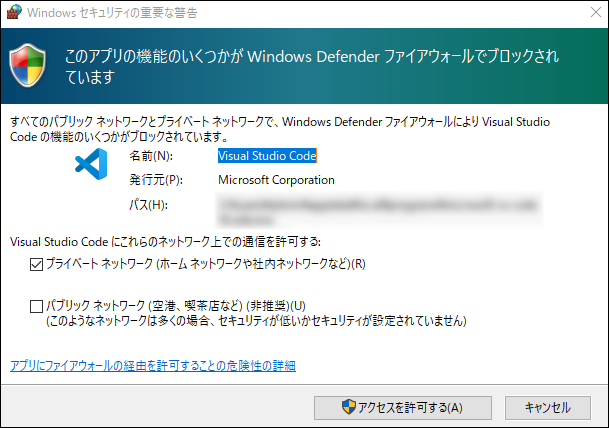
VSCode(Visual Studio Code)を起動して、拡張機能 Live Server をインストールします。
Visual Studio Code は Microsoft が開発している Windows、Linux、macOS、web 用のソースコードエディタです。
VSCode がまだ無い場合、
https://code.visualstudio.com/からダウンロードして、インストールが必要です。
拡張機能 → live と検索して、Live Server(Ritwick Dey) をインストールします。

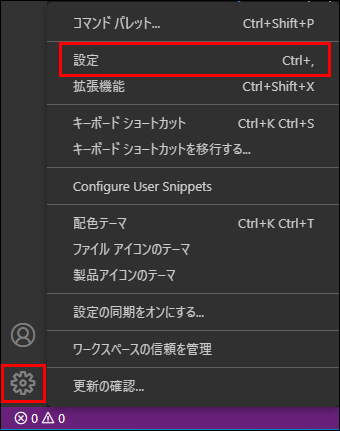
左下の歯車アイコン → 設定 をクリックするか、CTRL+, キーボードショートカットを使用し、設定画面を開きます。
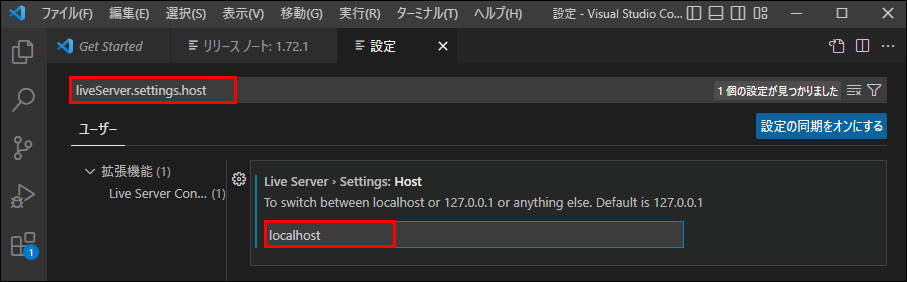
検索欄に liveServer.settings.host と入力して、
Live Server > Settings: Host の値を 127.0.0.1 から localhost に変更します。
Web アプリ作成
Web アプリ といっても、index.html 一個だけです。index.htmlのことを「アプリ」と言っています。
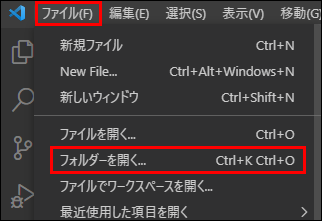
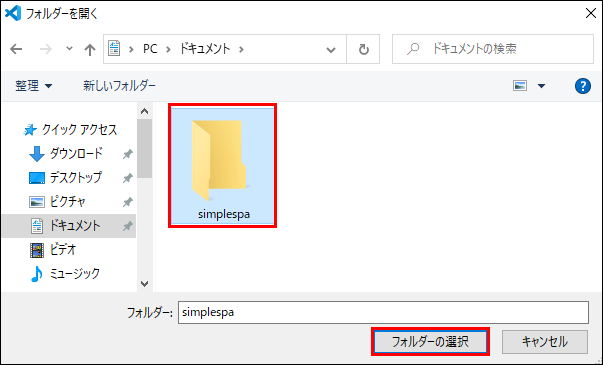
適当な場所に simplespa(名称は任意) という空フォルダを作成し、ファイル → フォルダーを開く で選択します。
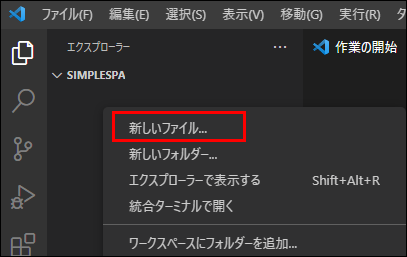
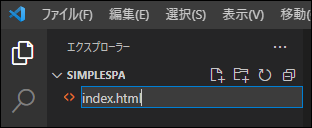
右クリック → 新しいファイル...
で index.html を作成します。
この内容を以下のようにして、保存します。
<html>
 <head>
   <meta charset="UTF-8">
   <meta http-equiv="X-UA-Compatible" content="IE=edge">
   <meta name="viewport" content="width=device-width, initial-scale=1.0">
   <script>
      const baseUrl = "https://org.api.crm.dynamics.com";      //<= Change this
      const clientId = "11111111-1111-1111-1111-111111111111"; //<= Change this
      const tenantId = "22222222-2222-2222-2222-222222222222"; //<= Change this
      const redirectUrl = "http://localhost:5500/index.html";
      const webAPIEndpoint = baseUrl +"/api/data/v9.2";


      // Configuration object to be passed to MSAL instance on creation.

      const msalConfig = {
         auth: {
            clientId: clientId,
            // Full directory URL, in the form of https://login.microsoftonline.com/<tenant-id>
            authority: "https://login.microsoftonline.com/"+tenantId,
            redirectUri: redirectUrl,
         },
         cache: {
            cacheLocation: "sessionStorage" // This configures where your cache will be stored
         },
         system: {
            loggerOptions: {
               loggerCallback: (level, message, containsPii) => {
                     if (containsPii) {
                        return;
                     }
                     switch (level) {
                        case msal.LogLevel.Error:
                           console.error(message);
                           return;
                        case msal.LogLevel.Info:
                           console.info(message);
                           return;
                        case msal.LogLevel.Verbose:
                           console.debug(message);
                           return;
                        case msal.LogLevel.Warning:
                           console.warn(message);
                           return;
                     }
               }
            }
         }
      };

   </script>
      <!-- Latest version of msal-browser.js from CDN as of 2022/09 -->
   <script
         type="text/javascript"
         src="https://alcdn.msauth.net/browser/2.28.1/js/msal-browser.min.js">
   </script>
   <style>
      body {
         font-family: 'Segoe UI';
      }

      table {
         border-collapse: collapse;
      }

      td, th {
         border: 1px solid black;
      }

      #message {
         color: green;
      }
</style>
</head>
<body>
<div>
   <button id="loginButton" onclick="signIn()">Login</button>
   <button id="logoutButton" onclick="signOut()" style="display:none;">Logout</button>
   <button id="getAccountsButton" onclick="getAccounts(writeTable)" style="display:none;">Get Accounts</button>
   <div id="message"></div>
   <table id="accountsTable" style="display:none;">
    <thead><tr><th>Name</th><th>City</th></tr></thead>
    <tbody id="accountsTableBody"></tbody>
   </table>
</div>
<script>
   const loginButton = document.getElementById("loginButton");
   const logoutButton = document.getElementById("logoutButton");
   const getAccountsButton = document.getElementById("getAccountsButton");
   const accountsTable = document.getElementById("accountsTable");
   const accountsTableBody = document.getElementById("accountsTableBody");
   const message = document.getElementById("message");
   // Create the main myMSALObj instance
   const myMSALObj = new msal.PublicClientApplication(msalConfig);

   let username = "";

   // Sets the username. Called at the end of this script.
   function selectAccount() {

      const currentAccounts = myMSALObj.getAllAccounts();
      if (currentAccounts.length === 0) {
         return;
      } else if (currentAccounts.length > 1) {
         // Add choose account code here
         console.warn("Multiple accounts detected.");
      } else if (currentAccounts.length === 1) {
         username = currentAccounts[0].username;
         showWelcomeMessage(username);
      }
   }

   // Called by the loginButton
   function signIn() {
      myMSALObj.loginPopup({
         scopes: ["User.Read",baseUrl+"/user_impersonation"] //<= Includes Dataverse scope
         })
         .then(response =>{
            if (response !== null) {
            username = response.account.username;
            showWelcomeMessage(username);
               } else {
                  selectAccount();
               }
         })
         .catch(error => {
               console.error(error);
         });
   }

   // Shows greeting and enables logoutButton and getAccountsButton
   // Called from signIn or selectAccount functions
   function showWelcomeMessage(username) {
    message.innerHTML = `Welcome ${username}`;
    loginButton.style.display = "none";
    logoutButton.style.display = "block";
    getAccountsButton.style.display = "block";
   }

   // Called by the logoutButton
   function signOut() {

      const logoutRequest = {
         account: myMSALObj.getAccountByUsername(username),
         postLogoutRedirectUri: msalConfig.auth.redirectUri,
         mainWindowRedirectUri: msalConfig.auth.redirectUri
      };

      myMSALObj.logoutPopup(logoutRequest);
   }

   // Provides the access token for a request, opening pop-up if necessary.
   // Used by GetAccounts function
   function getTokenPopup(request) {

      request.account = myMSALObj.getAccountByUsername(username);

      return myMSALObj.acquireTokenSilent(request)
         .catch(error => {
               console.warn("Silent token acquisition fails. Acquiring token using popup");
               if (error instanceof msal.InteractionRequiredAuthError) {
                  // fallback to interaction when silent call fails
                  return myMSALObj.acquireTokenPopup(request)
                     .then(tokenResponse => {
                           console.log(tokenResponse);
                           return tokenResponse;
                     }).catch(error => {
                           console.error(error);
                     });
               } else {
                  console.warn(error);
               }
      });
   }

   // Retrieves top 10 account records from Dataverse
   function getAccounts(callback) {
      // Gets the access token
      getTokenPopup({
            scopes: [baseUrl+"/.default"]
         })
         .then(response => {
            getDataverse("accounts?$select=name,address1_city&$top=10", response.accessToken, callback);
         }).catch(error => {
            console.error(error);
         });
   }

   /**
    * Helper function to get data from Dataverse
   * using the authorization bearer token scheme
   * callback is the writeTable function below
   */
   function getDataverse(url, token, callback) {
       const headers = new Headers();
       const bearer = `Bearer ${token}`;
       headers.append("Authorization", bearer);
       // Other Dataverse headers
       headers.append("Accept", "application/json");
       headers.append("OData-MaxVersion", "4.0");
       headers.append("OData-Version", "4.0");

       const options = {
          method: "GET",
          headers: headers
       };

     console.log('GET Request made to Dataverse at: ' + new Date().toString());

     fetch(webAPIEndpoint+"/"+url, options)
          .then(response => response.json())
          .then(response => callback(response))
          .catch(error => console.log(error));
    }

    // Renders the table with data from GetAccounts
    function writeTable(data) {

       data.value.forEach(function (account) {

           var name = account.name;
           var city = account.address1_city;

           var nameCell = document.createElement("td");
           nameCell.textContent = name;

           var cityCell = document.createElement("td");
           cityCell.textContent = city;

           var row = document.createElement("tr");

           row.appendChild(nameCell);
           row.appendChild(cityCell);

           accountsTableBody.appendChild(row);

       });

       accountsTable.style.display = "block";
       getAccountsButton.style.display = "none";
    }

    selectAccount();
  </script>
 </body>
</html>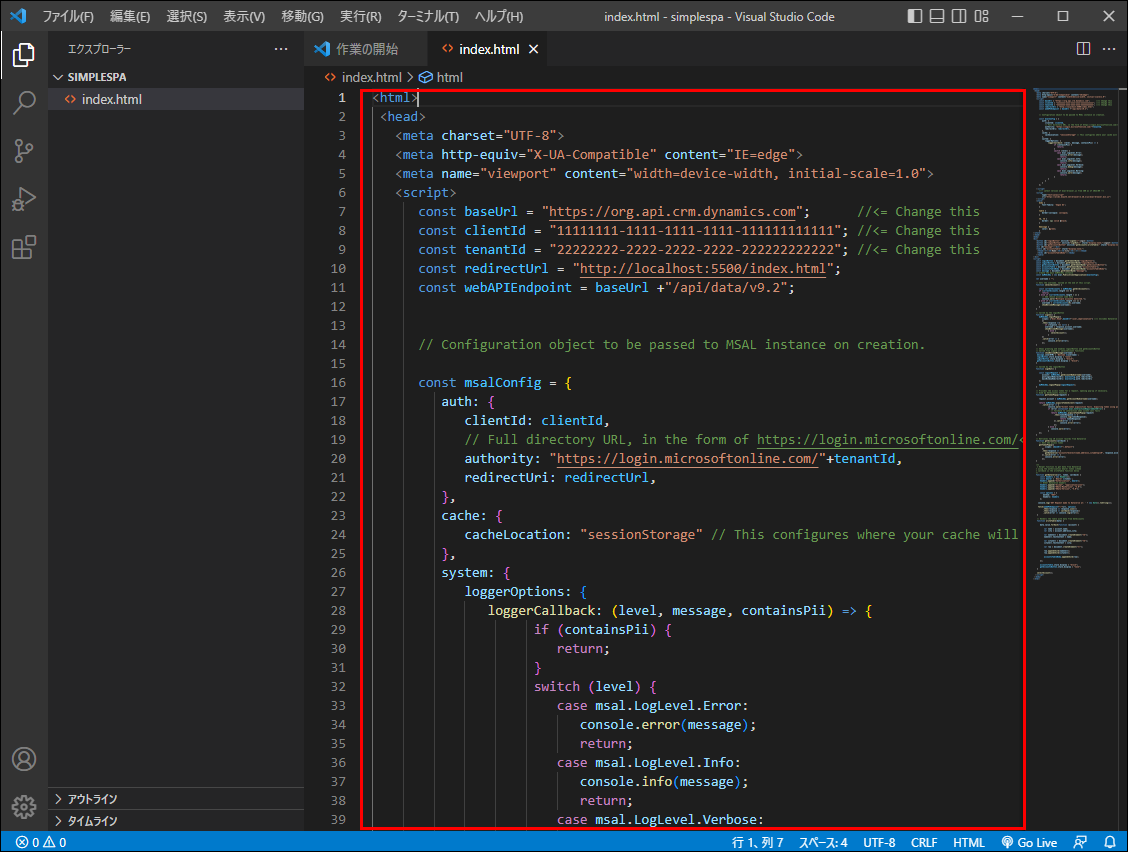
const baseUrl = "https://org.api.crm.dynamics.com";
の部分を書き換えます。
const baseUrl は、API の URL です。
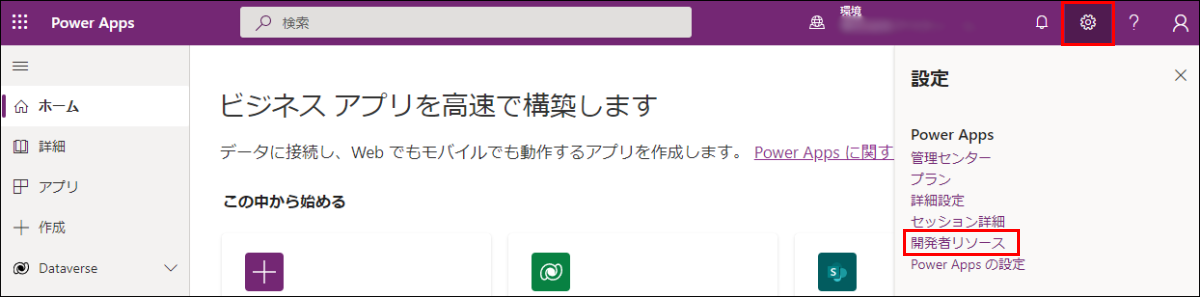
これは、Power Apps 右上歯車 → 開発者リソース で分かります。
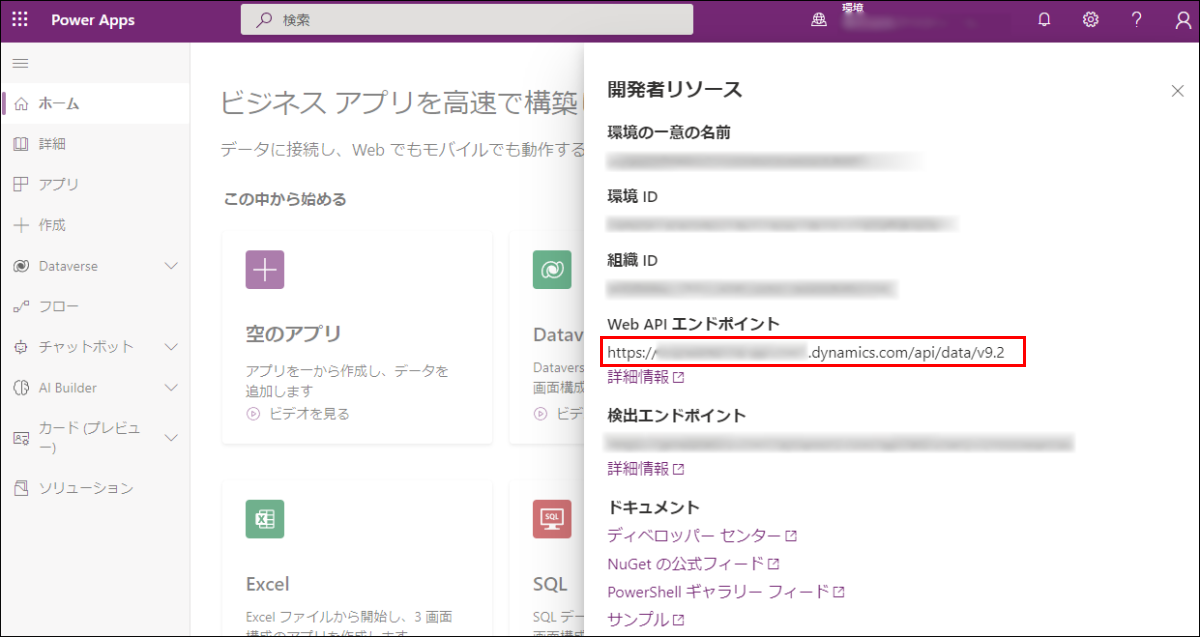
Web API エンドポイント のところに
https://***********.api.crm*.dynamics.com/api/data/v9.2
が表示されている場合、
const baseUrl = "https://***********.api.crm*.dynamics.com";
とします。
const clientId = "11111111-1111-1111-1111-111111111111";
const tenantId = "22222222-2222-2222-2222-222222222222";
部分は、
アプリケーションの登録の時に控えた
アプリケーション (クライアント) ID: 94228***-****-****-****-*******f77ec
ディレクトリ (テナント) ID: 0c6c0***-****-****-****-*******d0d2b
です。
const clientId = "94228***-****-****-****-*******f77ec";
const tenantId = "0c6c0***-****-****-****-*******d0d2b";
とします。
アプリのデバッグ
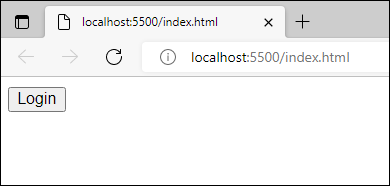
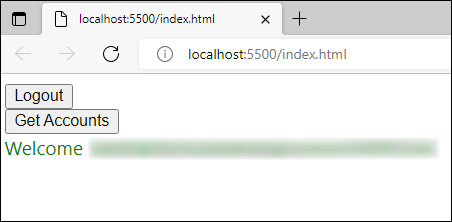
VS Code 右下に、Go Live ボタンがあります。
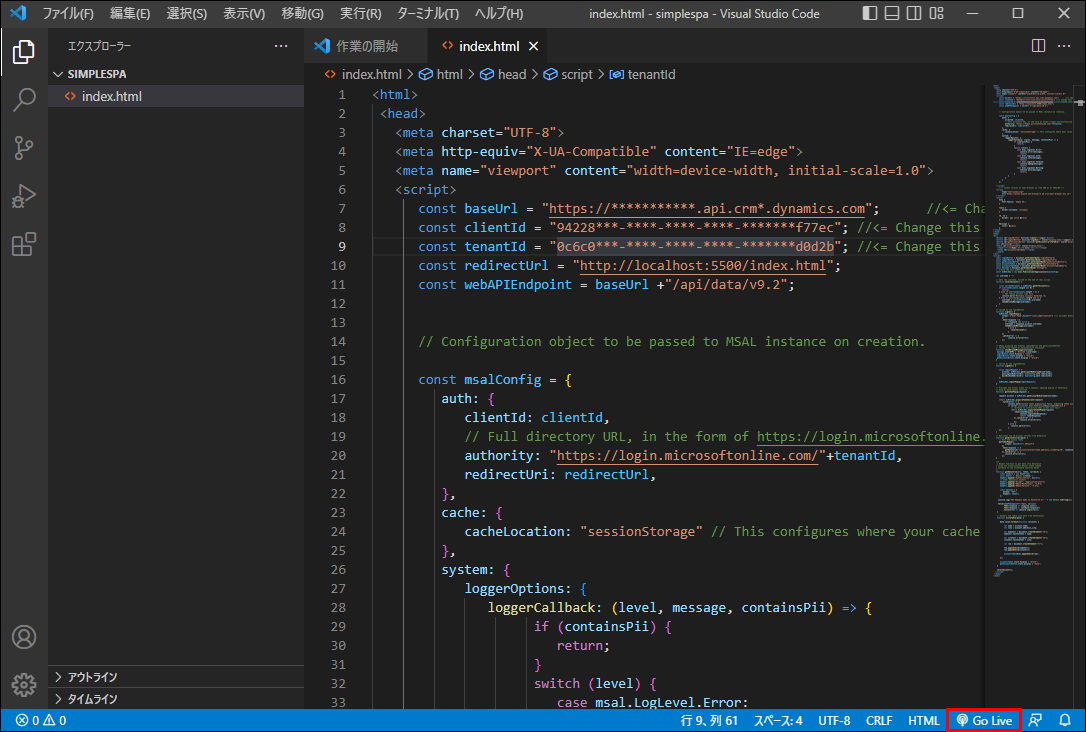 これを押すだけで、
http://localhost:5500 の Web サーバーが立ち上がって、http://localhost:5500/index.html の動作確認ができます。
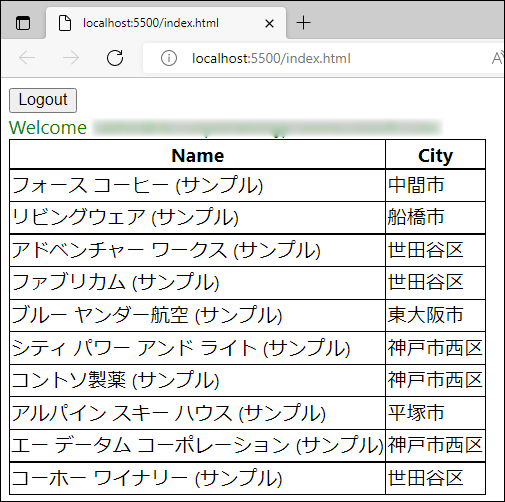
注意:account テーブルを select しています。account テーブルとは、"取引先企業" テーブルのことです。最初からダミーデータが入っています。このテーブルの読み込み権限が無いとデータを取得できません。
Go Live ボタン
↓

独自テーブル
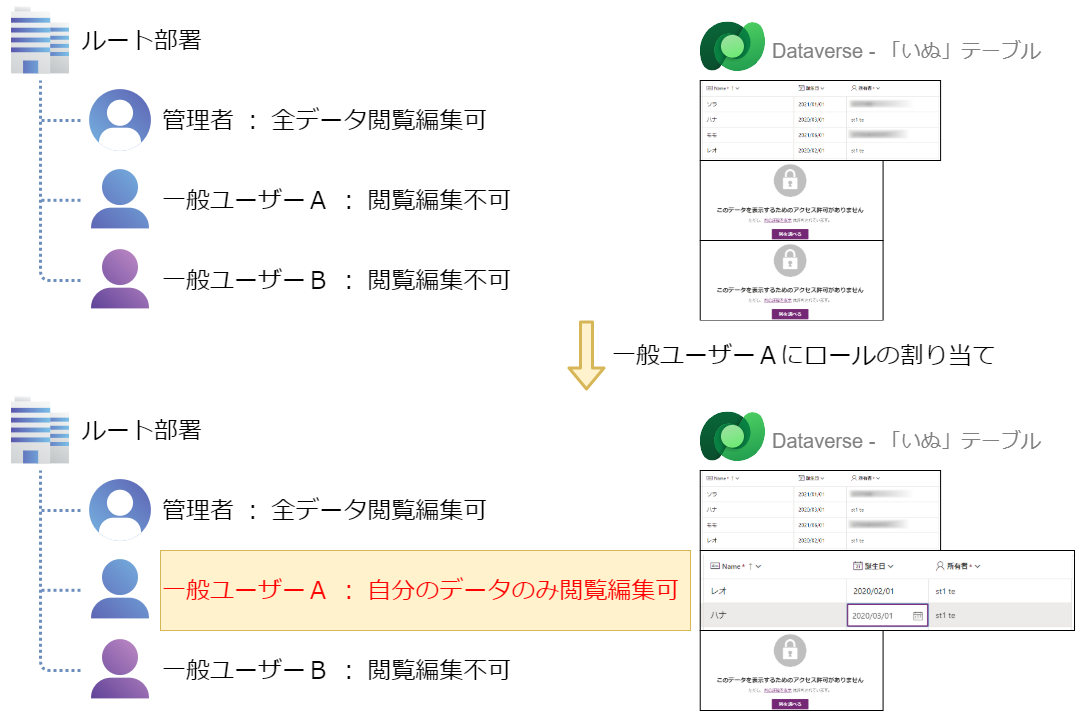
前回「Dataverse に独自テーブルを作って自分で登録したレコードしか閲覧編集できないようにする」の記事を書きました。
この記事の時、Dataverse に独自テーブル「いぬ(dog)」を作成して、セキュリティロール「Doggo」により、
管理者:テーブル「いぬ」の全レコードが閲覧編集可能
一般ユーザーA:自分が追加したレコードのみ閲覧編集可能
一般ユーザーB:テーブルデータは何も見えない
としました。
今回、これの続きとします。
まず、取得するテーブル名と列名を調べます。
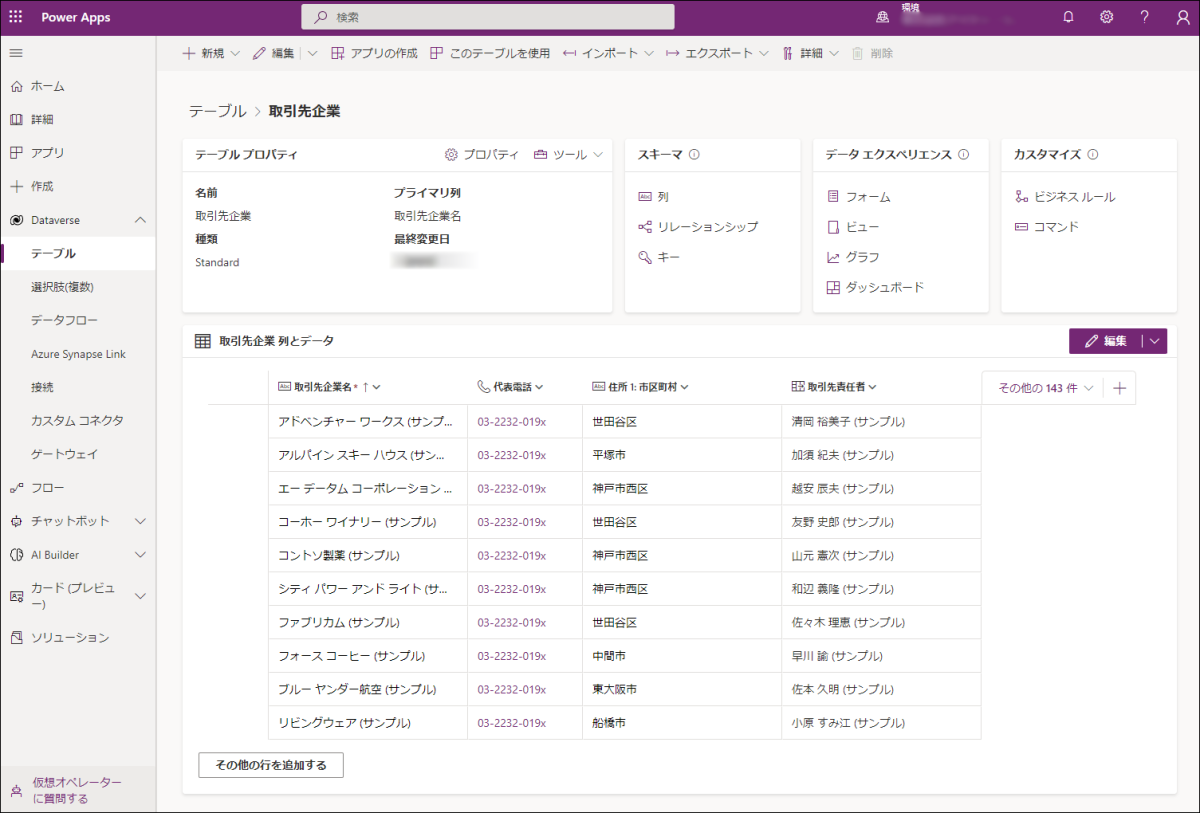
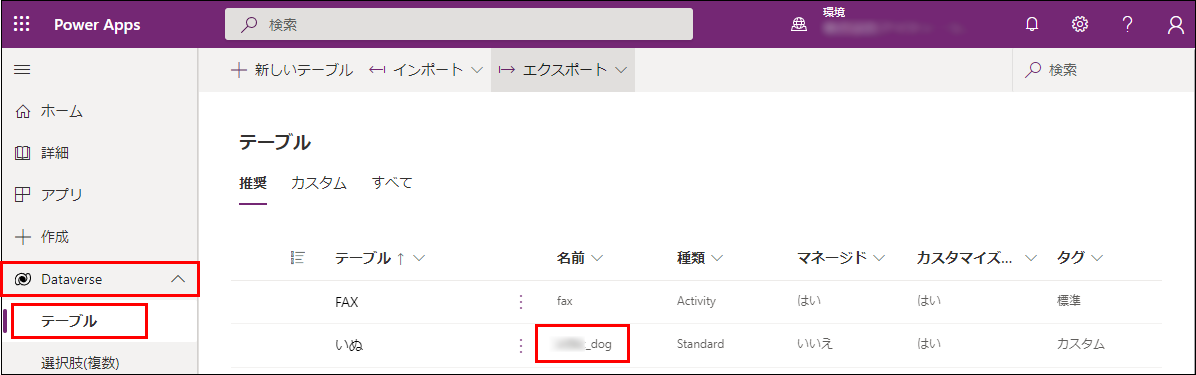
管理者で Power Apps ホーム(https://make.powerapps.com/)にて、Dataverse を開いて、テーブル をクリックします。
テーブルの名前を確認します。
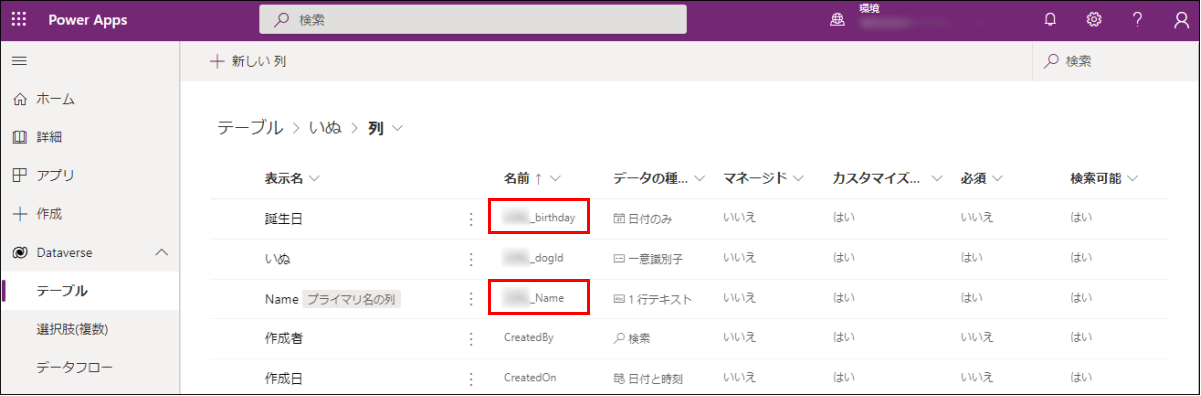
テーブル「いぬ」をクリックして、スキーマ のところから、列 をクリックします。

今回、「Name」列、「誕生日」列を取り出したいので、列の名前、xxxxx_Name(xxxxx_はプレフィックス)、xxxxx_birthday を確認します。
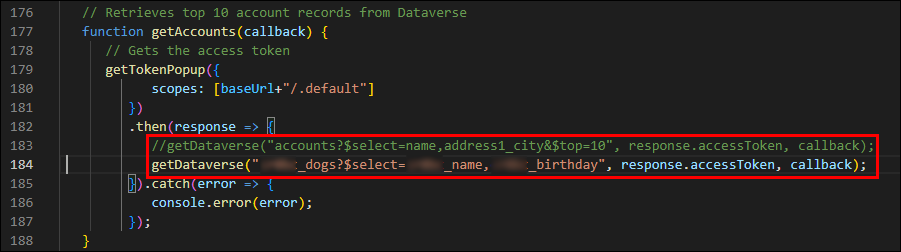
getDataverse("accounts?$select=name,address1_city&$top=10", response.accessToken, callback);
のところを
getDataverse("xxxxx_dogs?$select=xxxxx_name,xxxxx_birthday", response.accessToken, callback);
と書き換えます。
ここで重要な注意事項があります。確認したテーブルの名前、列の名前をそのまま書いてはいけません。以下のルールに従う必要があります。
・大文字は、小文字にする(例:xxxxx_Name→xxxxx_name)
・テーブルは、複数形にする(例:xxxxx_dog→xxxxx_dogs)
・プレフィックス(xxxxx_の部分)が有る場合は、プレフィックスを省略しない。
表示するところを
// var name = account.name;
// var city = account.address1_city;
var name = account.cr0bc_name;
var city = account.cr0bc_birthday;
と書き換えます。
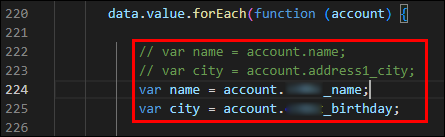
account、cityなどがそのままですが、動作には支障が無いため、ここでは、そのままとします。
Go Live で確認します。(操作方法は同じです。)
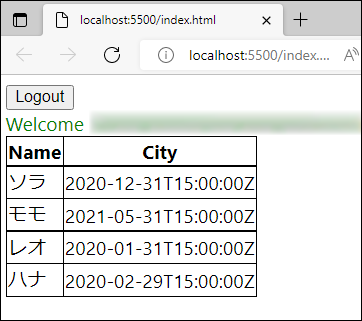
・管理者でサインインした結果
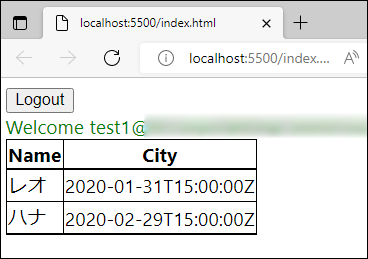
・一般ユーザーAでサインインした結果
・一般ユーザーBでサインインした結果
Get Accounts ボタンが無反応でした。
403 が返るようです。
![]()
ヨシ!
その他、宣伝、誹謗中傷等、当方が不適切と判断した書き込みは、理由の如何を問わず、投稿者に断りなく削除します。
書き込み内容について、一切の責任を負いません。
このコメント機能は、予告無く廃止する可能性があります。ご了承ください。
コメントの削除をご依頼の場合はXのDM等でご連絡ください。


